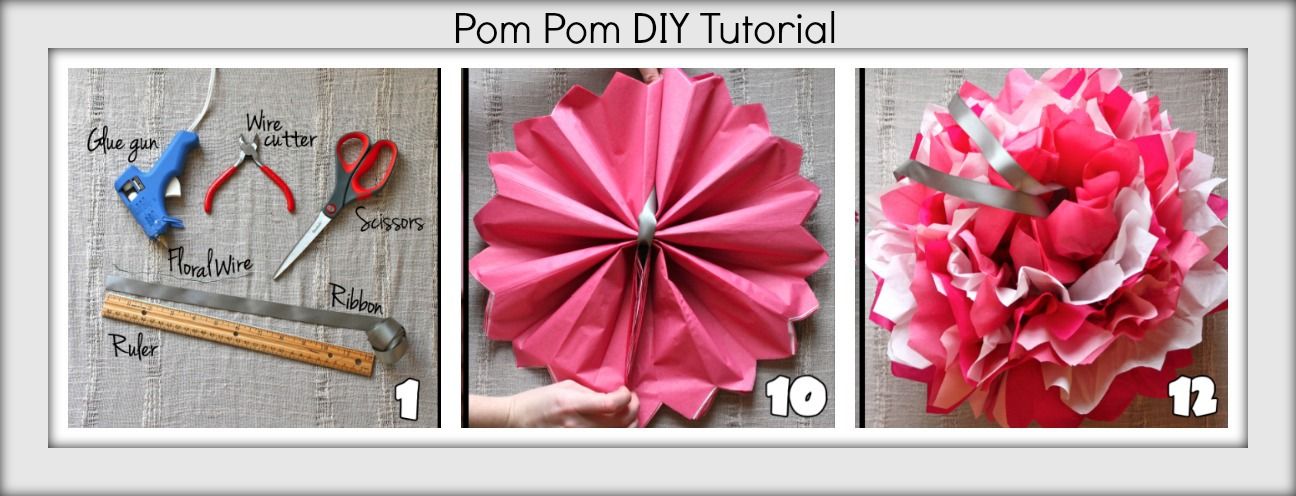
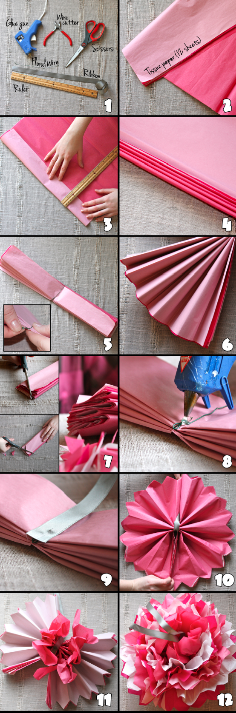
We three Rambling ladies love getting crafty. We also love simplicity! With Valentine’s Day around the corner, we thought we’d bring some pink into our lives, and what better way to do so than with some quick and easy tissue paper pom-poms? These lovely bursts of color make simple, ceiling décor for only a few bucks a pop and are a really excellent DIY option for any rustic chic event! All you need to do is follow these 12 simple steps:
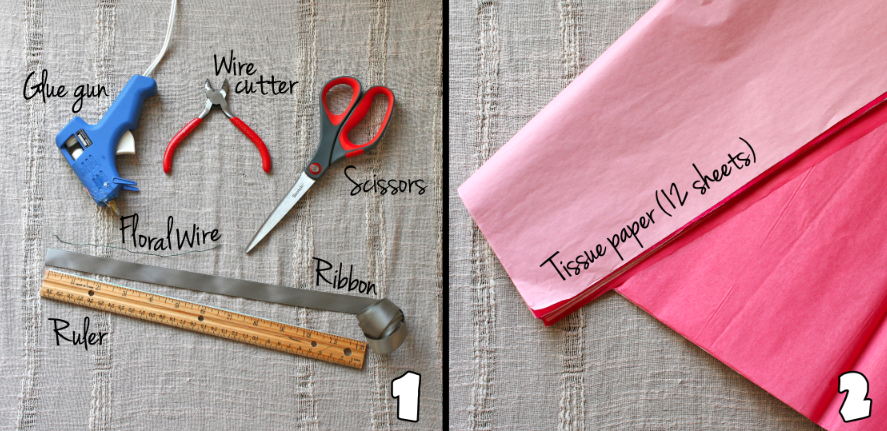
1. Gather your tools: scissors, wire cutters, floral wire, ribbon which fits your color scheme (we recommend going no thicker than 5/8th inch), a ruler, and glue gun. Measure out and cut a roughly 6-inch length of wire, and measure and cut your ribbon to 2x the length you desire for hanging your pom-pom. We chose a 48-inch length for our ribbon.
2. Neatly stack 12 sheets of tissue paper together. You can go with all one color or alternate like we did. We used 16 ½ x 24-inch sheets, which produces a medium sized pom-pom.
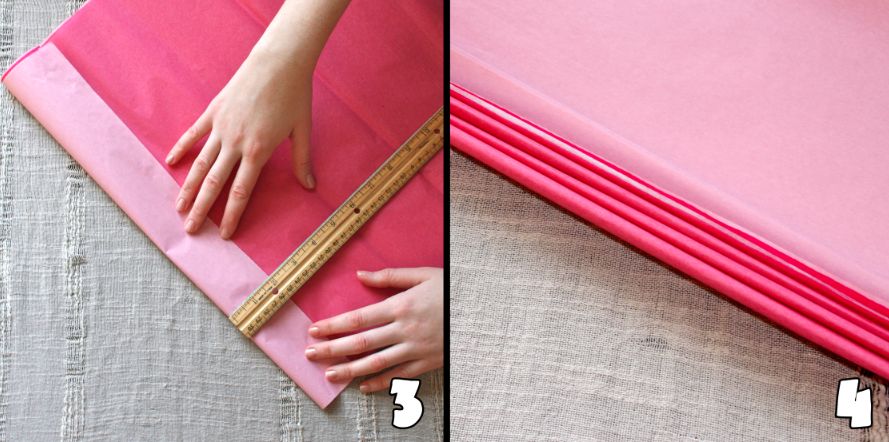
3. Divide the length of your tissue paper into even increments of about 1 ½ to 2 inches. This will be the width of each your pleats. (We did 12 sets of 2 inches)
4. Alternate your folds, as you move accordion style down the entire length of the tissue paper.
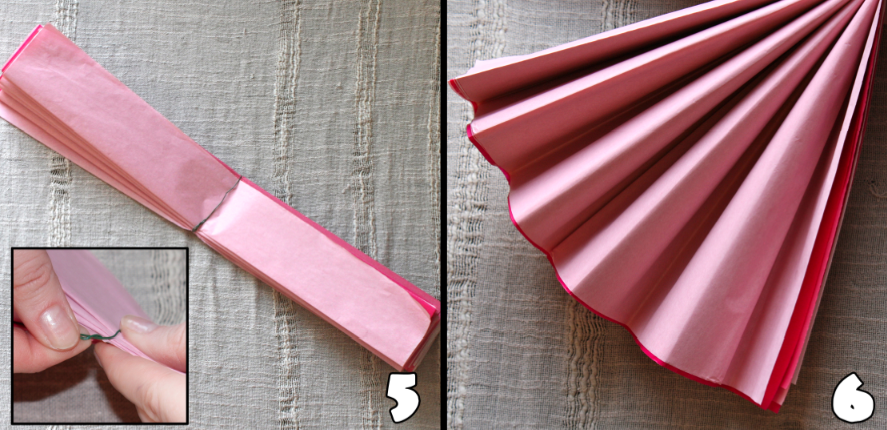
5. When your pleats are folded into an even stack, find the center point and secure it with the floral wire by twisting it in place and folding it back over on itself so that no sharp ends are sticking out.
6. Take a moment to inspect; you should now have a fan-shape of accordion pleats on each side of your floral wire.
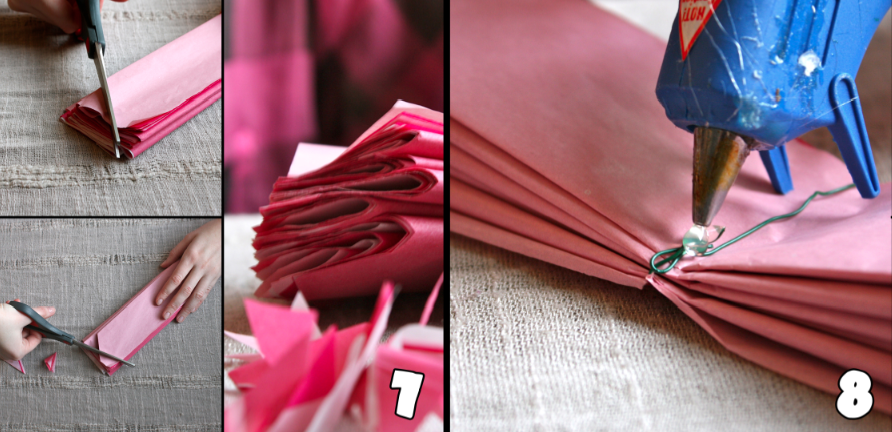
7. Cut the ends of your tissue paper. We chose pointed ends, though rounded ends also look great and having a mix of each in your pom-pom collection adds depth and texture. We recommend cutting each pleat one at a time, as the thickness makes it difficult to achieve at once.
8. When your ends are prepared, use the glue gun to apply glue over the fishing wire on one side.
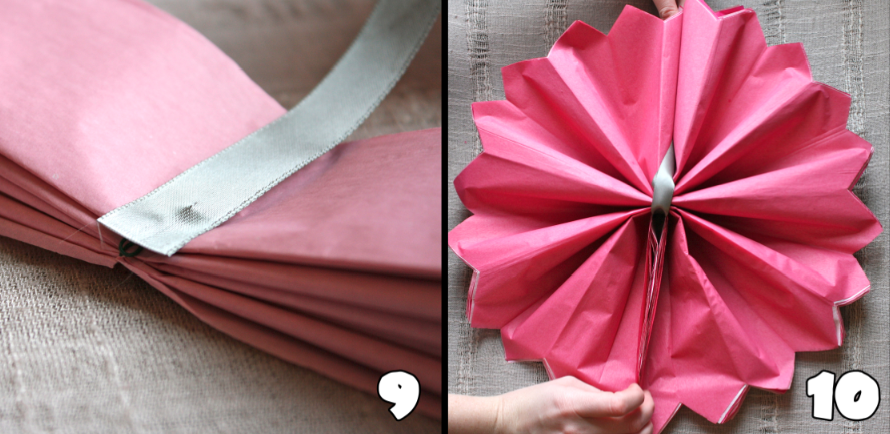
9. Attach one end of the ribbon to the glue, taking a moment to let it set. Turn it over and repeat steps 8 and 9, doing the same with the other end of the ribbon. You should be left with a long loop of ribbon that is suitable for hanging.
10. Fan out your tissue paper on both sides, making sure that it looks even. If your ends need any neatening, take the time to do so now.
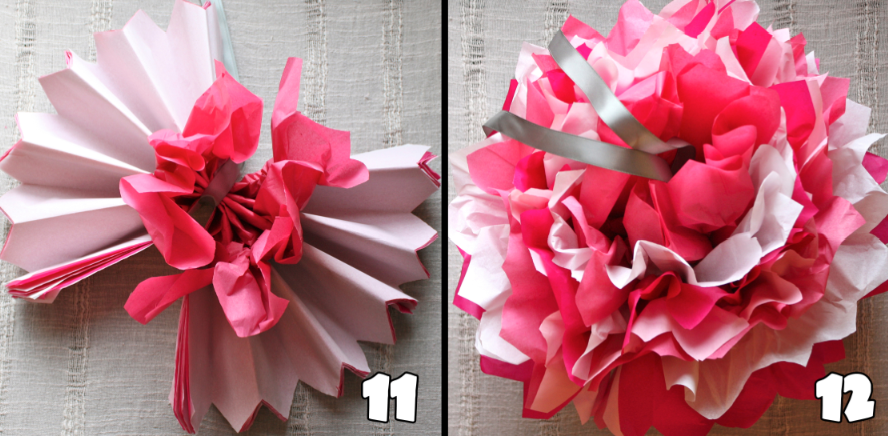
11. Carefully separate each layer of tissue paper at a time, gently pulling it up as far is it will go. You will need to even out the distribution of your pom-pom as you go. If you end up with any accidental rips or tears, don’t fret—they’ll be hardly noticeable in the end.
12. Voila! Aside from any last minute touches, your pom-pom should be ready for its eventful debut.
* Helpful tidbit: Sometimes you can find tissue paper packets that already have scalloped edges—in these cases, you don’t need to do any of the cutting yourself and you should just follow the already established width for your pleats.
Happy pom-pomming!
This DIY project was created by Rambling House Events for Rustic Wedding Chic.
 Rambling House – Rambling House is an event and food design company that specializes in personalized event décor and unique culinary products with a local focus. A traditional Irish “Rambling House” is a family home where locals
 gather to share in good conversation, storytelling, and song and dance. We strive to bring that spirit of community, tradition, and celebration together with each personal touch we add to your event, from handmade décor to our quality dishes produced from local food sources. Above all, our mission is to make your family and friends feel right at home. Visit Rambling House Events on Facebook.
Rambling House is an event and food design company that specializes in personalized event décor and unique culinary products with a local focus.
No Comments